
Speaking with kids about Earth Day is incredibly important. It’s a great opportunity to teach kids about recycling, waste, pollution and climate change.
Fueling their love for earth doesn’t have to be hard. Nor should it be all doom and gloom. Focusing on the beauty and fun of earth’s wonders will always work best at inspiring kids to care.
Kids absorb things like sponges so it’s incredibly important we’re talk about the climate crisis in a calm and collected manner and use a lot of facts. I’ll guide you on how to have those important conversations in this post.
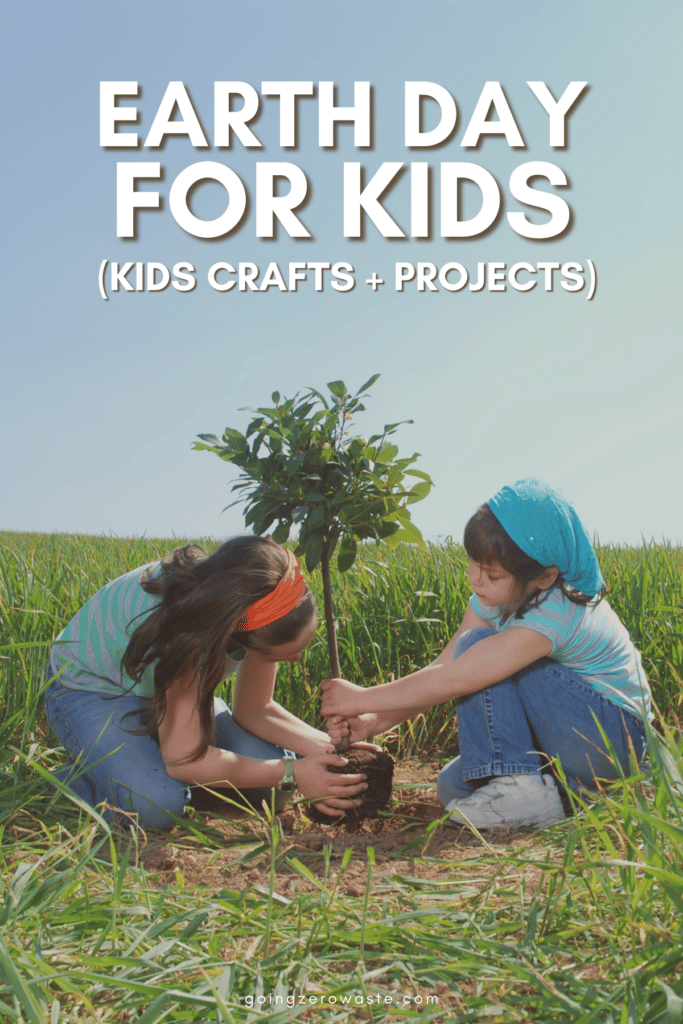
In honor of Earth Day for kids, here’s how to talk to children about the history of this important holiday. And climate change in general! Additionally, here are the best kids books, projects and crafts to enrich their love for the earth without triggering eco-anxiety.
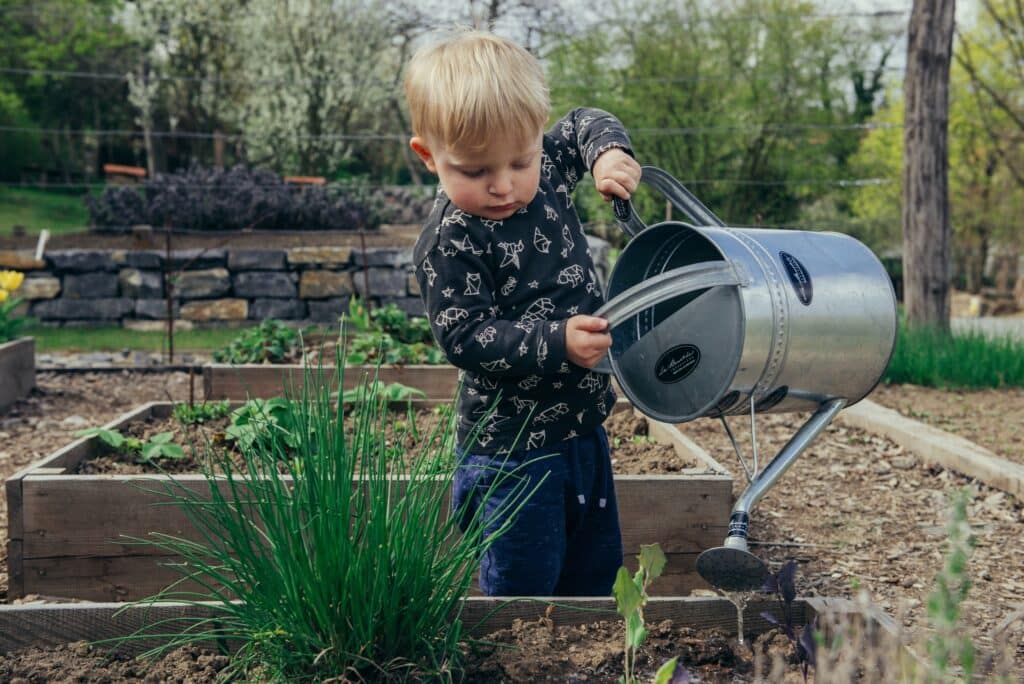
Table of Contents
history of earth day for kids
It’s important to talk to kids about the history of Earth Day in a way they’ll understand. Breaking it down for them as simply as possible is always best.
here’s what kids should know about earth day:
- Earth is an incredible place, but it needs our help to thrive.
- Every year on April 22nd more than a billion people celebrate Earth Day.
- Earth Day encourages us to take part in activities that help the planet like picking up litter, planting trees and recycling.
- The first Earth Day was celebrated in 1970 when a United States senator organized a demonstration to raise awareness on environmental issues on a national level. By the end of the year, the U.S. government created the Environmental Protection Agency.
- By 1990, Earth Day was celebrated as an event by over 140 countries across the globe.
how to speak to kids about climate change
While it’s normal to want to protect children from harsh truths, climate change isn’t a problem we can ignore and hope will go away. It’s important to talk to your kids about this topic openly and honestly. However, there are certain things to keep in mind first.
consider their age
Are they old enough to comprehend what climate change is? Younger children might not understand, but that doesn’t mean you can’t still instill a love for earth early on with fun projects, crafts + books (like the ones I’ll be talking about later on). A good age to start talking about it is probably around three, but be sure to break it up into digestible pieces they can better absorb and process.
see what they already know
They might have learned about it in school or overheard someone talk about it previously. Ask them if they’ve ever heard of climate change before and see what their response is. You might be surprised at what they say!
do your research ahead of time
It’s alright if you yourself don’t know all the facts on climate change – no one does. But it’s a good idea to get familiar with the facts before getting into a conversation about it so you can give accurate information to your child. You can also do research together! Here’s a really simple guide from BBC News that may help you answer any questions your kid has. Essentially, make sure they understand what fossil fuels and greenhouse gases are. Explain how humans are impacting the planet.
be prepared for feelings
Some complex and deep emotions may arise when children are faced with the effects climate change has and will have on the planet. That’s totally normal and understandable, but you must be ready for them. Don’t shut down their feelings but purposefully explore them instead. Prompting them with questions is a good idea. For example, ask them how they believe climate change could affect their favorite animal. This might help them put some of those complex feelings into perspective.
give them a reason to be hopeful
You never want to leave children feeling all hope is lost – but you also don’t want to sugarcoat the problems. Actively talk about the solutions with them after addressing the problems, and make sure to include things individuals can do. Follow it up with one of the projects, crafts or books on this list!
projects
Want something hands on to teach kids about caring for the earth? Undergo one of these eco-friendly projects. Not only will it be fun and informative, but it also doubles as a bonding experience!
Be mindful that these projects take time to fully complete. They can be started in a day’s time but the real fun in these projects is observing how they change in the coming days. These projects will keep your kids entertained over an extended period of time, which will help refresh their love for earth on a daily basis.
I have a whole post about sustainable science experiments to do with kids at home if you’re looking for more ideas.
plant something together
Gardening is a great way to teach kids about earth, get them interested in composting, and help them learn where food comes from. The soil is the ultimate recycler – it breaks down organic matter (like leaves) and recycles it back into nutrient-dense soil. Healthy soil actually removes carbon from the atmosphere!
Growing something from seed is the best choice for kids. This will allow them to see the entire process and understand plants better. It’s incredibly immersive to watch a plant grow from seed so it will be an experience they won’t likely forget.
for those with small spaces
Don’t have a lot of space? Try planting something in an upcycled water bottle or empty soup can. Fill it with slightly damp soil, then add a seed. Some of the easiest things to grow include beans, peas, herbs (like basil) and lettuce.
Add the soil to the container, then create a small hole by poking it with your finger. Place the seed inside the hole and cover it with a sprinkle of soil (don’t bury it too deep or it won’t get enough light).
Gently water the seed and place it in an area with good lighting. The best windowsills for seeds are generally facing East, West and South as these get a lot of sunlight.
Make sure to water the seed whenever the soil gets dry. Using a spray bottle may be the best option when it’s still growing so the sprout doesn’t get damaged.
If you’re using an upcycled plastic water bottle, be sure to show your child the root system if it begins to show up. Explain that the root system draws water and nutrients from the soil.
When the plant is big enough, transplant it to a bigger container, or bring it outdoors and into the garden.
Make sure to engage your child throughout all of this.
here are some prompts to ask children:
- What does the seed look like to you? How does it feel?
- Do you see it sprouting? What does it look like?
- Touch the sprout gently – what does it feel like? Does it have a smell?
- Can you find its roots? What about its stem? The leaves?
- What does this plant do? How can we use it when it matures?
- What does a plant need to live?
- Does the soil play a role in helping the plant live? How so?
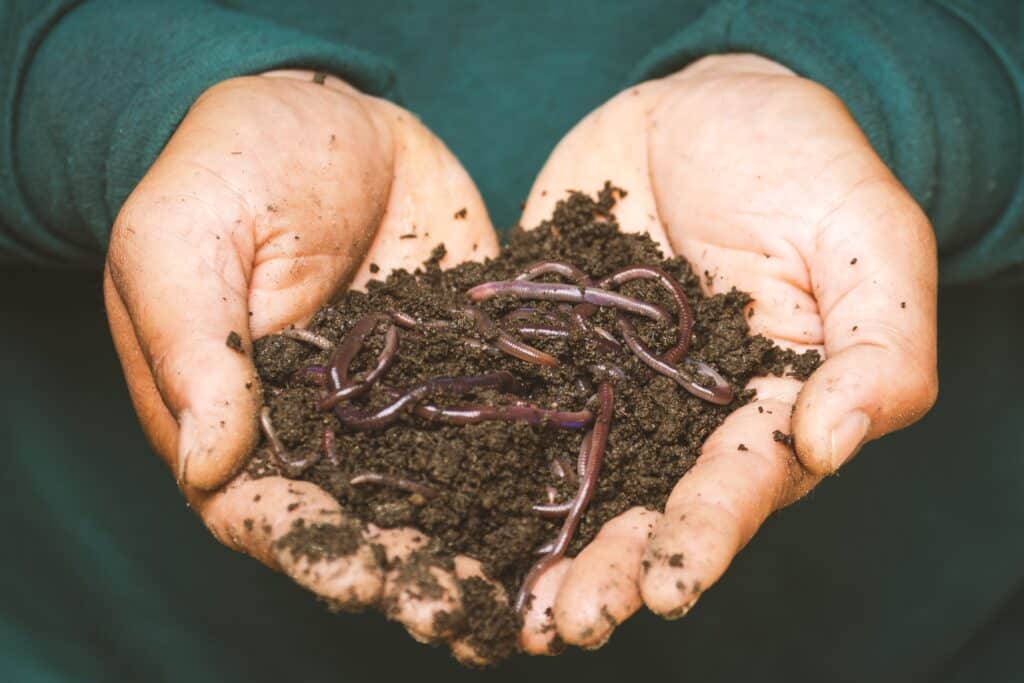
start a wormery
A wormery is a fun experience for a child because they get to interact with an animal, as well as see a natural form of recycling in action. It’s an immersive experience that changes with time.
get a good container
Begin by getting some sort of container – a big plastic bin will work great. See what you have on hand. Even a bucket could work. Just make sure you have something to cover it with – using a container with a lid would be best.
Make sure to drill some holes into the container and lid before doing anything else. Put some rocks and gravel at the bottom of the container. Rip up some black and white newspaper, then add it to the bin as well to create DIY worm bedding. Spray the bedding with some water so it’s damp.
prepare your soil + worms
Next, add in the garden soil, then finish with some veggie scraps or dry leaves on top. If your soil is really dry, add a bit of water to it – but not enough to make it soggy. You’re now ready to add your worms!
Red wrigglers are the best at making compost. You can probably get some at your local bait shop or even order them online. Or, if you prefer to make it more interactive with your kids, let them dig for the worms themselves (they’ll love it, trust me).
You can find some worms under rocks or damp areas of your yard/local park. Worms can be easier to find after a light rain.
Let your kids interact with the worms – encourage them to hold them and be gentle with them. It’s okay if they only want to observe them from afar too. Tell them it’s important to respect the worms. Don’t let smaller children injure or stress the worms out.
add the worms + care for them
Once you add the worms to the bin, don’t try to assist them in burrowing – this will scare them. They’ll do it on their own. It may take a few days.
Any worms that don’t burrow down on their own may be dead or weak and should be removed. Pouring some warm water on them may revive them – if not, they’re dead or dying and should be left out of the wormery.
Have your kids save their fruit and veggie peels for the worms. Let your kids add apple cores, banana peels and pears to the wormery on a regular basis. Just be sure not to add any meat, dish, dairy, potato chips, citrus, candy, or oils as the worms cannot eat these.
If any food is left uneaten for a few days it might grow mold, so be sure to remove this if you see it happening.
Worms prefer cooler temperatures so make sure to keep them out of direct sunlight and under some shade, or even indoors if it’s too hot outside. Make sure to keep the soil damp and don’t let it dry out too much. Compost should be ready in 2 to 3 weeks.
here are some prompts to ask children:
- How does the worm feel in your hand?
- What do worms like to eat?
- Do worms like the hot or cold?
- How do worms help the soil?
- What animals eat worms?
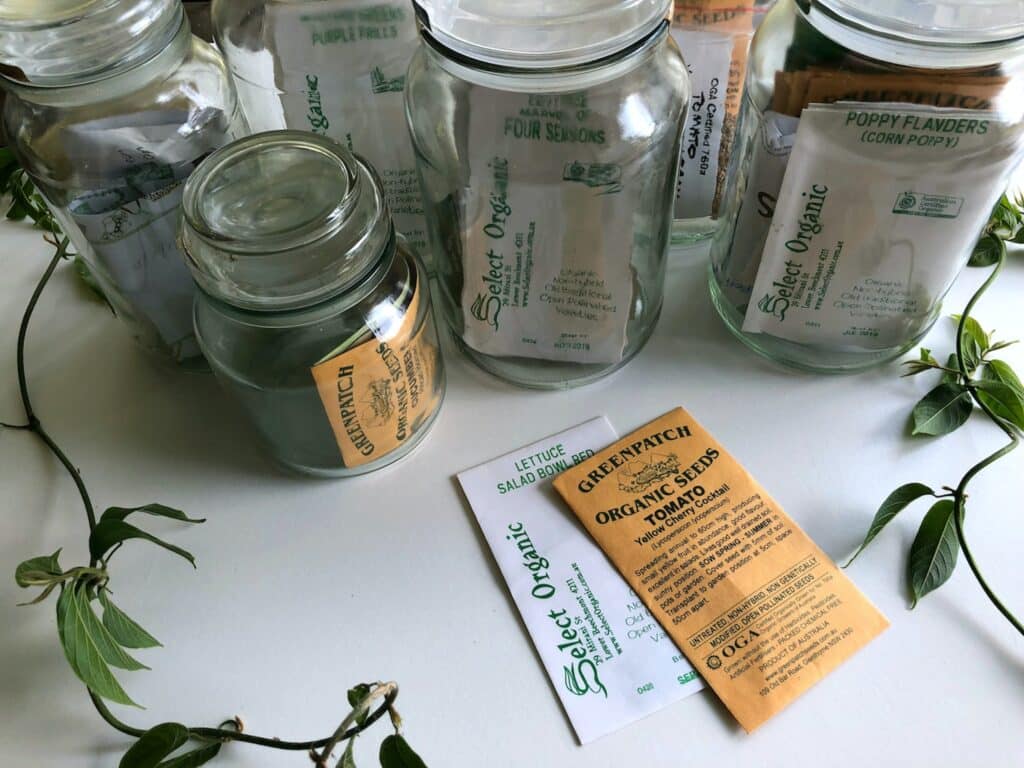
create a seed library
Assembling a seed library is a great project for kids because it will help them understand the importance of seed saving. This is especially true if you have a garden. Saving seeds helps diversify the plants we grow. Sadly, there aren’t many varieties of seeds available in grocery stores anymore – we tend to see a wider variety at farmers markets.
why save seeds?
Preserving seeds help crops and plants adapt to different climates and ecologies, ensure food security, and provide an alternative to genetically modified crops. Seed saving can also be a great way to honor different cultures and generations of knowledge.
Having access to seeds will ensure people can grow their own food. Many people don’t have access to fresh foods, or can’t afford them, so creating a seed library can change this.
how to save seeds from plants
You can create your own seed library by preserving seeds from plants you enjoy eating, or rare varieties.
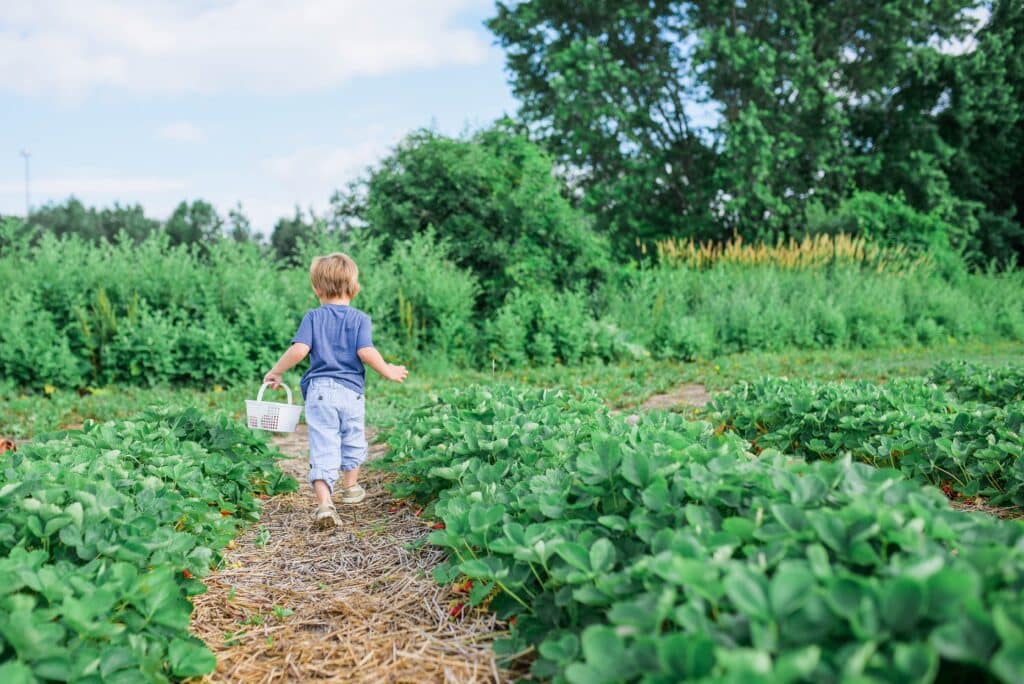
Begin by heading to the farmers market with your child and asking them which produce there they’d like to save seeds from. Some plants that have seeds at the farmers market include tomatoes, strawberries, peaches, cucumbers, zucchini, pumpkins and peppers.
Once you’ve gathered the produce that have seeds, open them up and use them for cooking. Put the seeds on the side. Let your children inspect the plant up close – have them feel it with their hands, smell it and potentially taste it. They can also examine the seeds up close. Ask them to compare and contrast the seeds.
Have your children help you wash off the seeds. Some seeds might need to soak for a while. Make sure no plant residue remains on them.
Next, you’ll want the seeds to thoroughly dry out. You can leave them on a windowsill under a napkin or towel. Pat them dry every so often.
Once the seeds are completely dry (double check – you don’t want any damp), store the seeds in tightly sealed glass jars.
Keep the seeds dry and cool. It’s best to keep them out of direct sunlight. They like temperatures between 32 and 41 degrees F, so storing them in a fridge isn’t a bad idea either.
Once all your seeds are saved, you can use them as you see fit. Have your children help you germinate and plant them when the time is right.
Make sure to engage your child throughout all of this.
here are some prompts to ask children:
- Which plant are you most excited to see grow? Which one do you want to plant first?
- What plant has the smallest seeds? The biggest? What shapes are they?
- Why is it important to save seeds?
- How do you think this seed will grow? Will it be big and tall or small and wide?
crafts
It’s a lot of fun to make crafts and DIYs with your child – especially when they’re good for the environment. These crafts are designed to reduce waste as well as provide entertainment to your child without harming the planet.
A lot of these crafts are both fun to make and then use, so they have double the value!
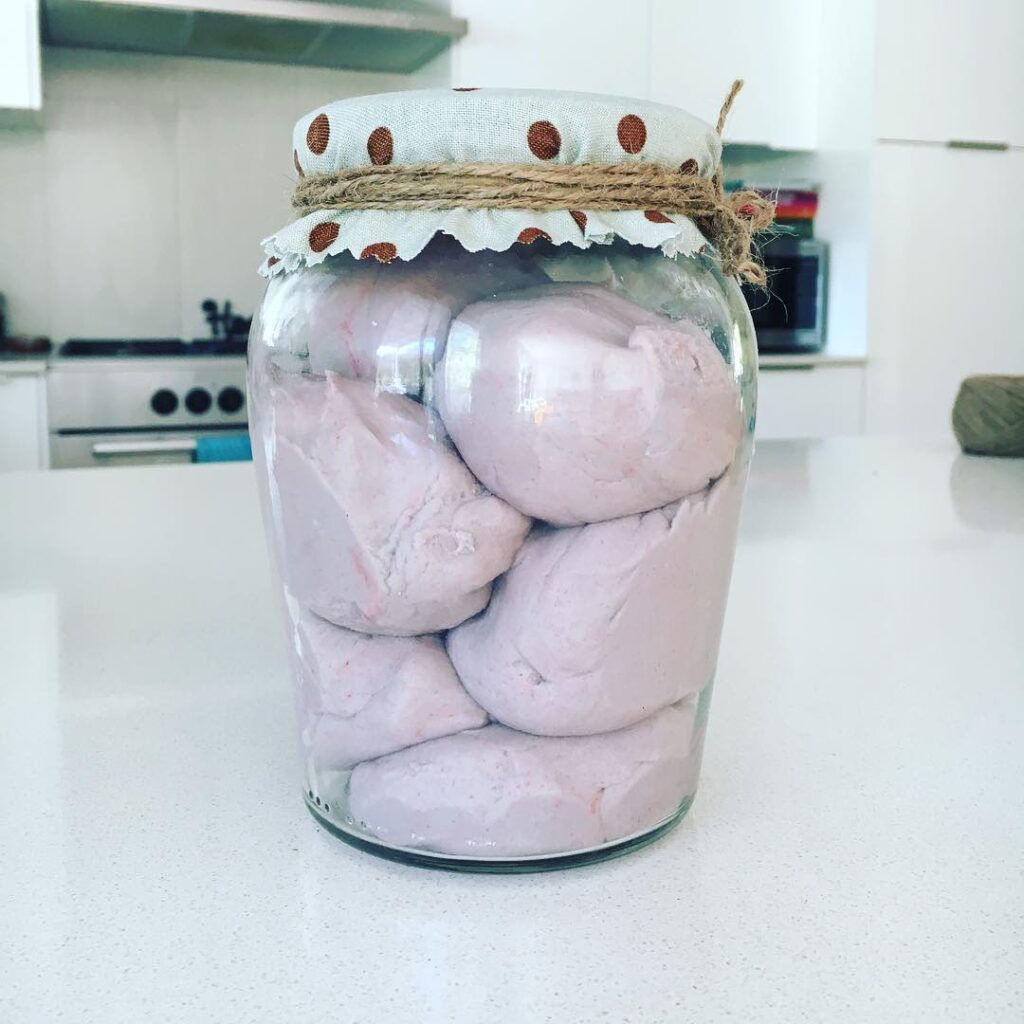
diy play dough
Making your own play dough is fun and a great way to reduce plastic waste. Traditional play dough comes in a plastic container, plus has loads of dye in it (which can contribute to water pollution). Have your children help you make DIY playdough – then they can use it whenever they like!
I love this recipe from Low Waste Family (pictured above) on Instagram. It should last 6 months if kept stored between plays (ideally in an air-tight container, like a glass jar).
Ingredients:
- 1 cup water
- ½ cup salt
- 1 tbs oil
- 1 tbs cream of tartar
- 2 cups flour
- A few drops of food coloring (natural food coloring is best)
Directions:
- Add the dry ingredients into a bowl and mix well.
- Next, mix in the cream of tartar and the oil (any vegetable oil will do).
- Add in the water (better if it’s recently boiled – but be careful as it’ll be very HOT). Mix it all together until it forms a dough.
- After its cooled, separate into several balls of dough if you’d like to make different colors. Roll it into balls and punch out the middle to form a small indent to add the food coloring to.
- Drip a few drops of the food coloring into the indent. Use your hands to knead the dough and mix the color in properly. This is very messy but fun to do with kids!
- Store your playdough in an air-tight container. Use as you’d like, making sure to put it back in the container after use.
diy crayons from old crayons
Do you notice broken crayons or little crayon nubs that your child can barely use anymore? Upcycle those broken crayons into new ones! This is a great way to reduce waste and a fun craft to do with your kids. Even better, make it Earth Day themed by keeping the colors blue and green and using a muffin tin.
I really love the DIY crayons in the picture above by Hergets By The Beach – they look like mini earths!
Materials:
- 1 muffin tin
- Peeled and broken crayons
Directions:
- Preheat your oven to 200 degrees.
- Peel the crayons – to do this faster, let the crayons soak in arm water for 10 minutes. This will remove glue/peel easily.
- If you can, break the crayons into smaller pieces (this will help them melt quicker), then fill the muffin tins with the crayon pieces. It’s okay to overfill the molds because the crayons will take up less space once they melt.
- Bake for 10 to 15 minutes, or until crayons are melted through. Remove them from the oven, then let them cool for an hour, or transfer them to a freezer for 30 minutes.
- Pop the crayons out of the tin and they’re ready for use!
Honestly, this upcycled crayon craft would pair perfectly with the Healthy Earth coloring book – a coloring book all about sustainability.
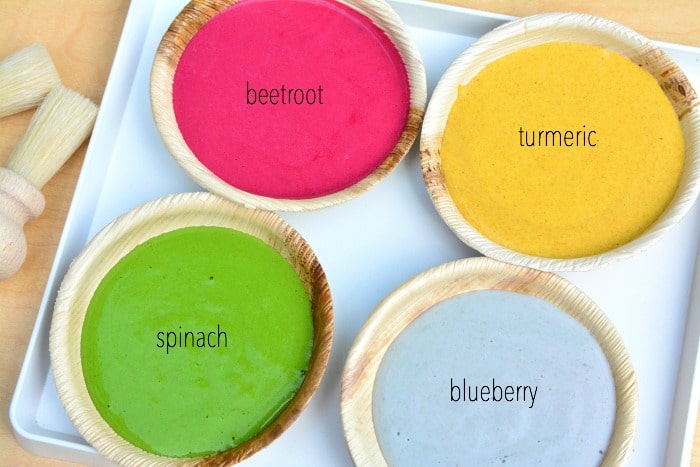
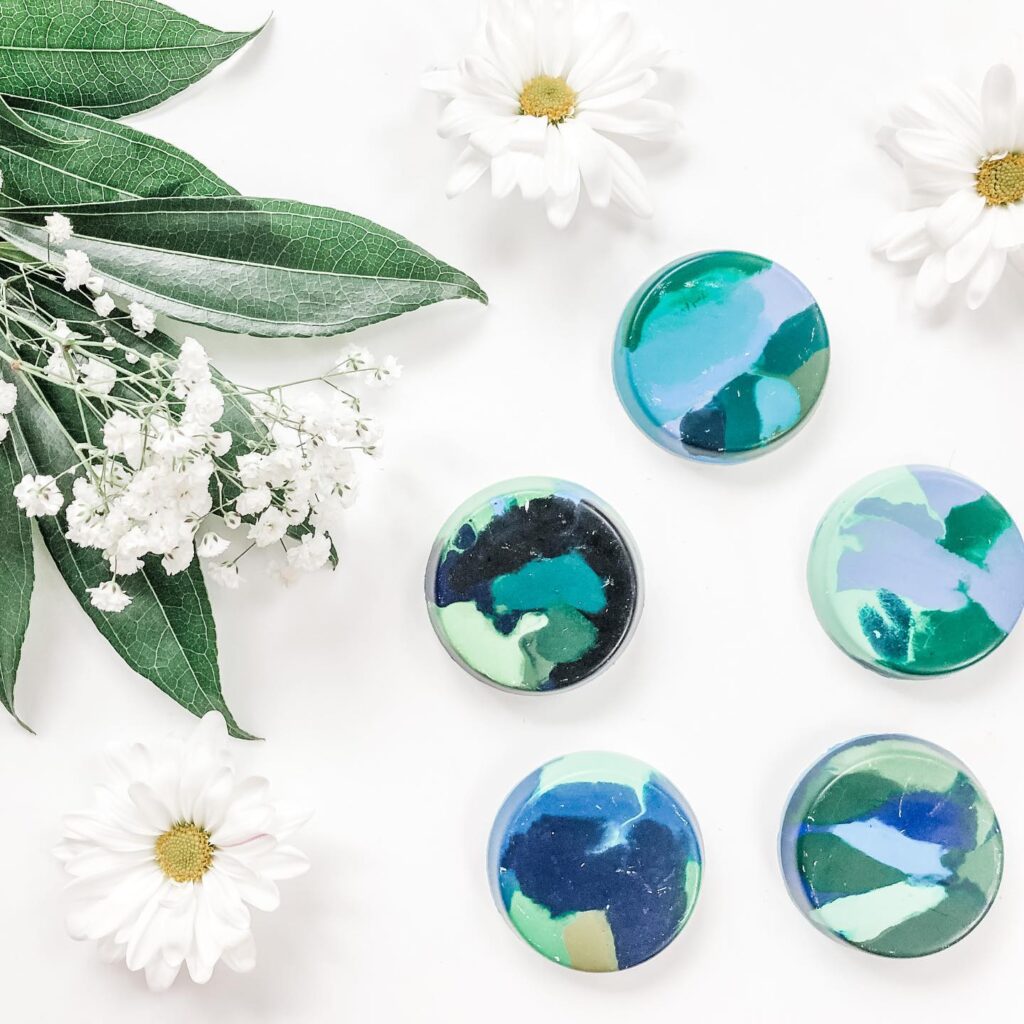
plant paints
Most paints are made from – you guessed it – plastic. Even the acrylic paint we like to create arts and crafts with is made using plastic, aka a fossil fuel. Little kids are more likely to eat paint, so it’s better to use plant-based paints. I love the recipe from How We Montessori (pictured above).
Making these plant paints is a safe option that’s both fun to make and use! You can use these paints to create all sorts of crafts – have your kids paint paper bags and toilet paper rolls with it. You can also use scrap paper. These also make great finger paints!
Ingredients:
- 1 cup cornflour
- Some water
- Colorings: Beetroot (pink), turmeric (yellow), spinach (green), blueberries (blue/purple)
Directions:
- In a saucepan, mix corn flour and about 1/2 cup of cold water, whisking them together. You’ll want it to mix with the water smoothly, no lumps.
- Put the saucepan on low heat and keep whisking. Once the corn flour and water have cooked more, take it off the heat and slowly add a little more water to thin it just a bit. It should have a nice texture – just a tad bit goopy. If it gets too thin, cook it a little more. If it’s too thick, add some more water and whisk until you reach the desired consistency.
- Next, make your colorings. For beetroot, blueberries and spinach, you can juice them for the most vibrant colors. For turmeric, use its powder form (just not too much – a little goes a long way). Blueberries can also be squished and strained for the juice by hand.
How are you going to explain Earth Day for kids to understand? Let me know in the comments which of these activities you’re going to try!


